Table of contents
- What This Dryer Problem Is Really Telling You
- A Clogged Lint Filter Can Slow Drying More Than You Think
- A Blocked Dryer Vent Is One of the Most Common Causes
- The Exterior Vent Hood May Be Restricting Airflow
- Overloading the Dryer Can Leave Clothes Damp
- Your Washing Machine May Be Sending Clothes to the Dryer Too Wet
- The Dryer May Be Running Without Producing Enough Heat
- A Power or Fuel Supply Problem Can Reduce Drying Performance
- Thermostats and Temperature Controls Can Affect Drying
- A Dirty Moisture Sensor Can End the Cycle Too Soon
- The Drum May Not Be Turning the Clothes Correctly
- Room Conditions and Dryer Installation Can Affect Drying Time
- How to Troubleshoot a Dryer That Runs but Does Not Dry
- Conclusion
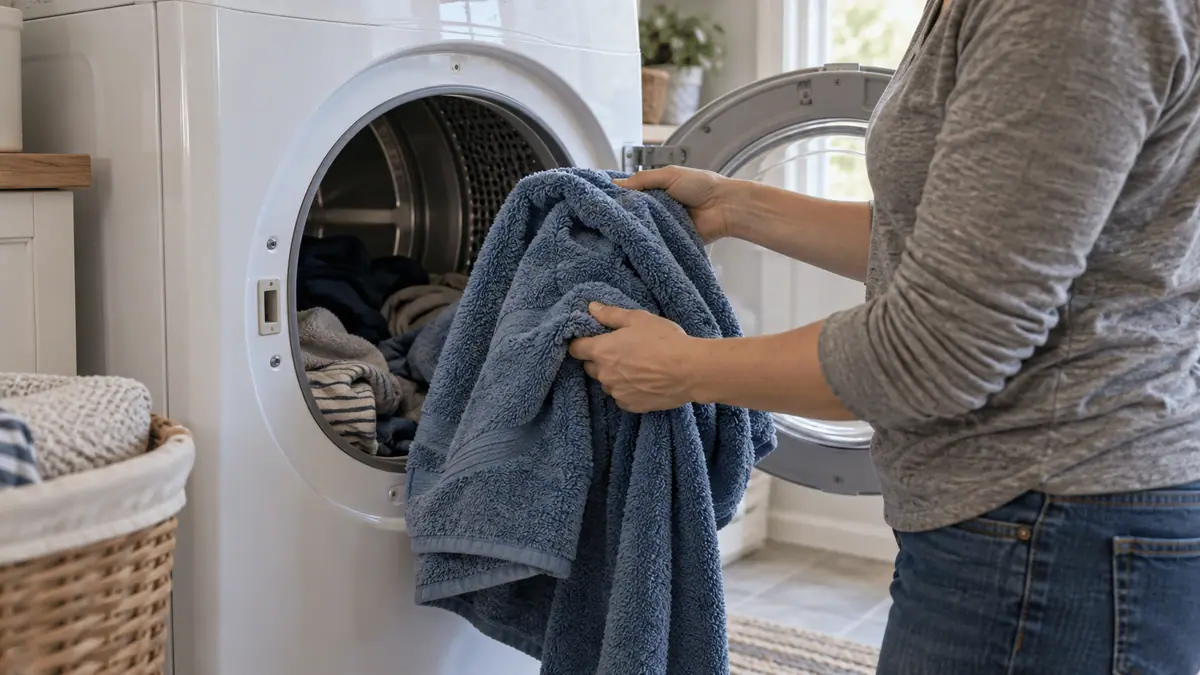
Few laundry problems are more annoying than hearing the dryer finish a full cycle, opening the door, and discovering that your clothes are still damp. The machine sounds like it is working. The drum is turning, the timer counts down, and maybe the clothes even feel warm. Yet towels are still heavy with moisture, jeans feel clammy, and another full cycle seems unavoidable. When a dryer runs but clothes stay wet, something is preventing the machine from completing one of its two essential jobs: adding enough heat or moving enough moisture-filled air out of the drum.
A dryer does not dry clothes simply by making them hot. Heat is only half of the process. As warm air passes through wet fabric, it absorbs moisture. That humid air then has to leave the machine through the vent system. Fresh air enters, gets heated, passes through the laundry, picks up more moisture, and exits again. Think of it like drying a wet floor with a fan. Warm air helps, but if you trap all that damp air in a closed room, the floor takes forever to dry. The same principle applies inside your dryer.
That is why one of the biggest mistakes people make is assuming that wet clothes automatically mean a failed heating element. Sometimes they do, but restricted airflow is at least as important to investigate. A clogged lint screen, crushed exhaust hose, blocked wall vent, or exterior vent flap that barely opens can make an otherwise functional dryer take two or three cycles to finish one load.
Load size matters too. So does the condition of the washer. If your washing machine leaves clothes dripping wet because it is not spinning properly, the dryer has to remove far more water than it was designed to handle efficiently.
The good news is that many drying problems can be checked with your own hands before you start replacing anything. A careful DIY inspection can often tell you whether you are dealing with airflow, heat, load size, moisture sensing, installation, or an internal mechanical issue.
What This Dryer Problem Is Really Telling You
When a dryer runs normally but the clothes remain wet, the first question should not be, “Which part is broken?” A better question is, “What part of the drying process is missing?” That change in thinking can save you from replacing perfectly good components.
A dryer needs three basic things to work properly: heat, airflow, and tumbling. Remove any one of them and drying performance drops quickly. If the machine produces heat but cannot exhaust humid air, clothes may get very hot without becoming dry. If airflow is excellent but the dryer produces little or no heat, clothes may tumble for an hour and still feel cool and damp. If the drum does not turn correctly, hot air cannot move evenly through the fabric.
Start by paying attention to how the clothes feel when the cycle ends. Are they cold and wet? That may suggest a heating problem. Are they extremely warm but still damp? Restricted airflow moves higher on the list. Are thick towels wet while lightweight shirts are dry? The load may have been too large or poorly mixed.
Cycle behavior offers clues too. Does an automatic drying cycle stop after only ten or fifteen minutes even though the clothes are clearly damp? A moisture-sensing issue or incorrect cycle selection could be involved. Does the dryer run much longer than it used to? Airflow restriction or declining heating performance may be the reason.
Also think about when the problem started. If drying performance became worse gradually over several months, lint buildup in the vent system is a strong possibility. If it changed immediately after the dryer was moved, inspect the exhaust duct for crushing or kinking. If it began after an electrical issue in the house, check the power supply.
Do not ignore environmental changes either. A dryer installed in a very cold garage may behave differently from one in a climate-controlled laundry room.
The goal is to gather clues before touching anything. Temperature, drying time, airflow, load condition, and recent changes can point you toward the real cause much faster than opening the machine and guessing.
A Clogged Lint Filter Can Slow Drying More Than You Think
The lint filter looks simple, but it plays a huge role in dryer airflow. Every load releases tiny fibers from clothing, towels, bedding, and other fabrics. The lint screen catches much of that material before it reaches deeper sections of the exhaust system. When the screen becomes covered, air has a harder time moving through the dryer.
A heavily clogged lint filter can explain why your dryer takes too long to dry clothes. Warm air enters the drum, absorbs moisture, and then struggles to escape. The dryer may still feel hot, which makes the problem confusing. You open the door and think, “It is definitely heating, so why are these towels still wet?” The answer may be that hot, humid air is staying inside too long.
Clean the lint screen before or after every load. Do not just remove the obvious thick layer. Hold the filter up to a light and look through the mesh. In some cases, residue from fabric products can create a nearly invisible coating over the screen. The filter may look clean while airflow through the mesh is actually restricted.
You can perform a simple check with water. If the filter is designed to be washed, run a small amount of water over the mesh. Water should pass through easily rather than sitting on the surface. If it beads up, wash the screen gently with warm water, mild dish soap, and a soft brush. Allow it to dry fully before reinstalling it.
Also inspect the filter housing. Lint can collect below the removable screen, especially if the filter has not always been seated correctly. With the dryer unplugged, remove accessible lint using a vacuum attachment or soft brush. Do not push tools deeply into areas you cannot see.
A clean lint screen also matters for safety. Restricted airflow raises dryer temperatures and forces the appliance to run longer.
If your dryer has recently started taking two cycles to dry normal loads, start with this five-minute check. The easiest dryer repair is often simply restoring the airflow the machine was designed to have.
A Blocked Dryer Vent Is One of the Most Common Causes
If the lint screen is clean but drying takes forever, the exhaust vent deserves serious attention. In many homes, this is the single most important place to look when a dryer runs but clothes stay damp.
The dryer exhaust system carries warm, moisture-filled air from the machine to the outdoors. Lint that passes through the filter can slowly collect inside the duct. Over time, the opening becomes narrower. Airflow decreases little by little, so you may not notice the change immediately. A load that once took forty-five minutes starts taking sixty. Later it takes ninety. Eventually you find yourself running the dryer twice for almost every load.
A blocked vent often creates a recognizable pattern. Clothes may become very hot but remain damp, the dryer cabinet may feel hotter than usual, and the laundry room can feel warm or humid. Drying times steadily increase even though the machine still appears to produce plenty of heat.
You can perform a basic airflow comparison. With the dryer operating normally, check the airflow at the outdoor vent if it is safely accessible. You should feel a strong, steady stream of warm air. Weak airflow suggests a restriction somewhere between the dryer and the outside opening.
Another test is to inspect the connection behind the dryer. Unplug the appliance first. Disconnect the exhaust duct if it is safely accessible and look for heavy lint accumulation. If the duct is packed with lint, the rest of the vent path may need cleaning too.
Long vent runs, multiple elbows, and flexible ducting can collect lint more easily than short, straight systems. A vent that travels through a wall, ceiling, crawlspace, or roof may require more thorough cleaning than the short section you can reach behind the dryer.
Do not run a vented dryer permanently disconnected into the house. The exhaust carries heat, moisture, and lint that should go outdoors.
A restricted dryer vent is not just an efficiency problem. Heavy lint accumulation can contribute to dryer overheating and fire risk. If your dryer suddenly needs much longer to dry, vent airflow should be checked before you assume the heating system has failed.
The Exterior Vent Hood May Be Restricting Airflow
Sometimes the dryer, lint filter, and indoor duct look perfectly clean, yet airflow is still weak. In that case, walk outside and inspect the point where the dryer exhaust leaves the house. The exterior vent hood is easy to forget because it is physically separated from the appliance, but it is part of the same airflow system.
Most exterior dryer vents use a flap, damper, or set of louvers that opens when the dryer pushes air outside. When the dryer stops, the cover closes to help keep animals, insects, weather, and outdoor air from entering the duct. If that cover becomes stuck, blocked, or clogged with lint, the dryer cannot breathe properly.
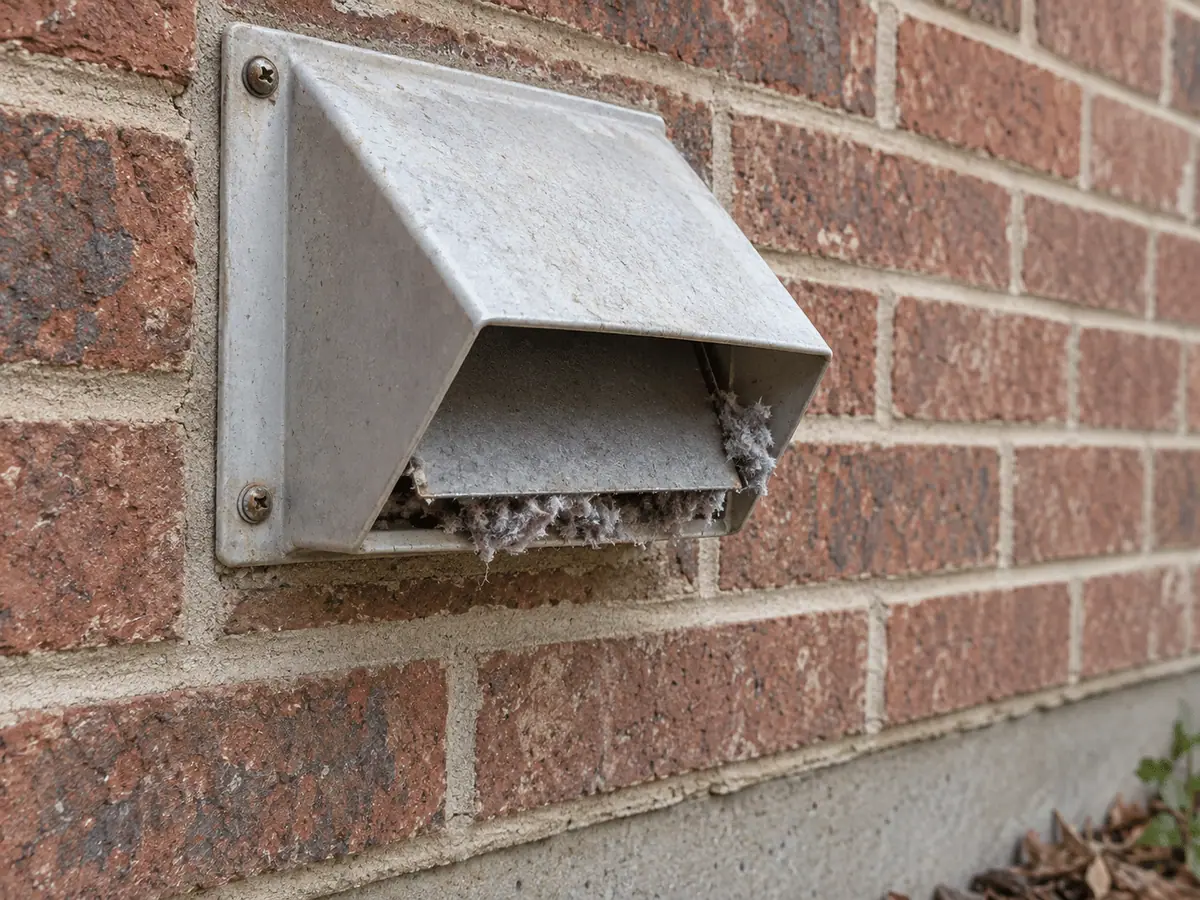
Turn the dryer on and observe the exterior opening from a safe position. The flap should open noticeably, and you should feel a steady stream of warm air. If the cover barely moves or keeps falling closed, airflow may be restricted upstream or at the vent itself.
Lint can collect around the edges of the hood and form a thick mat. In colder climates, ice or snow can also block the opening. Leaves, debris, and nesting material may create restrictions as well.
Clean accessible debris with the dryer turned off. If the opening is high above the ground, on a roof, or otherwise unsafe to reach, do not climb or improvise. A difficult vent location may require appropriate equipment.
Be careful with mesh screens placed over dryer exhaust outlets. Fine mesh can catch lint rapidly. A proper exterior dryer vent needs to allow unrestricted exhaust while still providing appropriate protection when the dryer is off.
Another clue is condensation. If moisture cannot escape, you may see dampness around the vent opening or inside sections of ductwork.
After clearing the exterior hood, run the dryer again and compare the airflow. A dramatic improvement can translate directly into shorter drying times.
It is easy to focus on the appliance because that is where the wet clothes are. But the dryer can only perform properly if the entire exhaust path from the drum to the outdoors remains open.
Overloading the Dryer Can Leave Clothes Damp
Sometimes there is nothing mechanically wrong with the dryer at all. The load itself is simply too large.
Clothes need space to tumble. As the drum rotates, laundry should lift, fall, separate, and expose different surfaces to the moving warm air. When the drum is packed tightly, clothing moves as one heavy mass. Air cannot circulate through the center of the load efficiently, and moisture becomes trapped between layers of fabric.
This problem is especially common with towels, bedding, sweatshirts, jeans, and other thick materials. You may fit everything into the drum physically, but that does not mean the dryer can move enough air through it to remove moisture efficiently.
A good clue is uneven drying. Lightweight items may come out completely dry while thicker pieces remain wet in folded sections. A fitted sheet can wrap around smaller clothes and create what I sometimes call a “laundry burrito.” The outside gets hot and dry while damp items remain trapped inside.
Try splitting one very large load into two smaller loads. If each smaller load dries normally, the dryer probably does not have a mechanical problem.
You should also separate fabrics when practical. Heavy towels and thin synthetic shirts dry at very different rates. When they are mixed together, an automatic cycle may stop because the lighter items are already dry while heavier pieces still contain a lot of moisture.
Overloading also increases strain on the motor, belt, support rollers, and other moving components because the dryer has to rotate more weight. A dryer may tolerate occasional heavy loads, but routinely packing the drum completely full is not a good long-term habit.
The exact usable capacity depends on the dryer design and the type of fabric, so there is no universal percentage that works for every load. The practical rule is simple: clothes should have enough room to tumble freely rather than staying compressed together.
If your dryer works beautifully with half a drum of laundry but struggles whenever you pack it to the door, the solution may be smaller loads rather than replacement parts.
Your Washing Machine May Be Sending Clothes to the Dryer Too Wet
The dryer may be getting blamed for a problem that actually starts in the washing machine.
Before clothes reach the dryer, the washer’s final spin removes a large percentage of the water. The better that spin performs, the less work the dryer has to do. If your washer suddenly begins leaving laundry much wetter than usual, drying times can double even though the dryer itself is functioning perfectly.
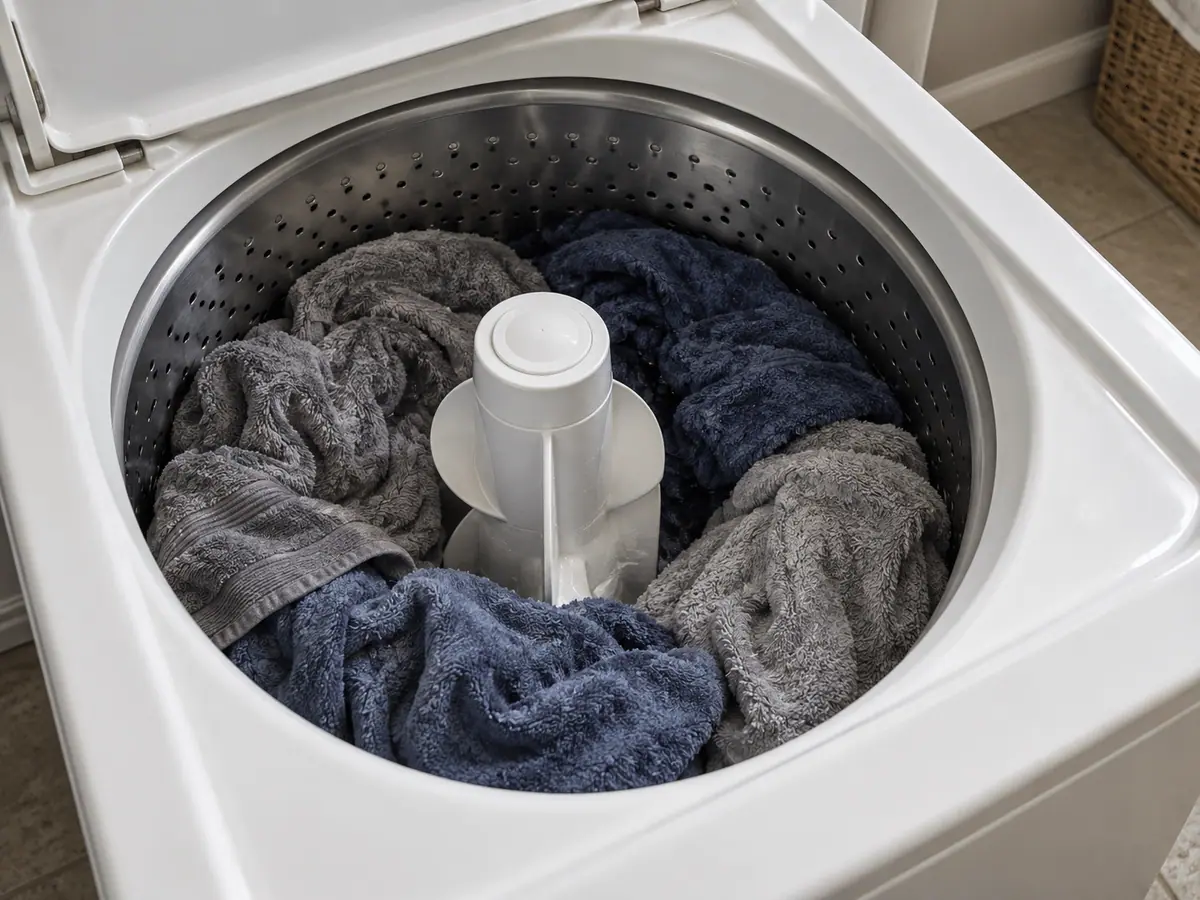
Pay attention when you transfer laundry. Clothes should be damp, but they should not normally be dripping or heavy with standing water after a proper high-speed spin. Towels will naturally hold more moisture than lightweight shirts, but a significant change from normal is important.
A washer may leave clothes too wet because the load became unbalanced and the machine reduced spin speed. Drainage problems can have the same effect. If water does not leave the washer efficiently, the machine may never achieve a proper final extraction.
Incorrect washer settings matter too. Delicate or low-spin cycles intentionally leave more water in clothing. If someone changes the wash program and forgets about it, the dryer suddenly appears to be underperforming.
Try an extra spin cycle before moving the clothes to the dryer. If the laundry comes out noticeably lighter and then dries normally, investigate the washer rather than the dryer.
You can also compare similar loads. If two towels feel much heavier than they used to after washing, something in the wash or spin process may have changed.
This is a great example of why appliances should not always be diagnosed in isolation. The washer and dryer work as a system. The washer’s job is not only to clean the fabric but also to remove enough water that the dryer can finish efficiently.
Running a dryer for two hours because the washer failed to spin properly wastes time and energy without addressing a problem that may require washer repair.
Whenever a dryer seems to have suddenly “lost power,” ask one simple question before opening it up: Are the clothes entering the dryer wetter than they used to be? The answer can save you a lot of unnecessary troubleshooting.
The Dryer May Be Running Without Producing Enough Heat
If airflow looks good and the load size is reasonable, check whether the dryer is actually producing enough heat. A dryer can tumble completely normally even when its heating system is not working.
Start with a simple observation. Run a normal heated cycle with a small load for several minutes, then pause the machine and carefully feel the clothing. The laundry should become noticeably warm. If everything remains close to room temperature, you may have a heating problem.
In an electric dryer, heat is typically generated by an electrical heating element. If that element fails, the motor may still run and the drum may continue turning. From the outside, the dryer looks completely operational. The only missing ingredient is heat.
Some heating elements fail completely. Others develop damage that causes reduced or intermittent heating. In those cases, clothes may become slightly warm but still require much longer than normal to dry.
Gas-heated dryers use a different system. The drum and controls can operate even if the burner does not ignite properly. You may hear the machine running normally but get little or no sustained heat.
Before assuming that any heating component is defective, confirm that the dryer is not intentionally set to air dry, fluff, no heat, or another low-temperature program. It sounds obvious, but cycle settings cause plenty of service calls.
Restricted airflow can also make heating behavior confusing because dryers use temperature controls that may cycle the heater off when internal temperatures rise too quickly. In other words, a blocked vent can make a healthy heater behave as though it is weak.
If you remove an access panel for inspection, disconnect the dryer from power first. Electric dryers may use high voltage, and internal connections are not something to test casually.
Heating diagnosis often requires a multimeter and an understanding of electrical safety. Visual inspection can identify obvious damage, but electrical testing should only be performed if you know how to do it safely.
The key is to separate “the dryer runs” from “the dryer heats.” Those are two different functions, and one can work perfectly while the other has failed.
A Power or Fuel Supply Problem Can Reduce Drying Performance
A dryer can sometimes run even when it is not receiving the complete energy supply needed for heating. This is particularly important with electric dryers because the motor and heater may not rely on exactly the same electrical conditions.
In many electric dryer installations, the appliance uses a higher-voltage circuit for heating. It is possible for part of the electrical supply to be interrupted while the motor still has enough power to turn the drum. The dryer appears alive, but clothes remain cool or barely warm.
Check the electrical panel for a tripped breaker. Some dryer circuits use a linked double-pole breaker. A problem may not always look like the classic fully tripped breaker you expect. If you are comfortable doing so, follow normal breaker reset procedures. Do not repeatedly reset a breaker that trips again. A recurring trip indicates an electrical fault that needs proper investigation.
Also look at the power cord and outlet for any signs of overheating, discoloration, melting, or burning smell. If you see any of those symptoms, stop using the dryer and have the electrical connection evaluated. Do not keep running the appliance while hoping the problem clears itself.
For a gas-heated dryer, confirm that the gas supply valve is open if it has recently been closed for service or moving. If other gas appliances are also experiencing problems, the issue may not be inside the dryer at all.
Never disassemble gas lines or ignition components casually. Gas leaks require immediate attention and appropriate safety procedures.
If the dryer was recently installed or moved and has never heated correctly since, supply problems move higher on the list. A previously reliable dryer that suddenly loses heat may have an internal component failure, but external power or fuel should still be verified before parts are replaced.
This is another reason not to diagnose purely by sound. The drum motor can create the illusion that the entire appliance is functioning.
A dryer requires more than motion. It needs a reliable energy source for the heating system, and a partial electrical or fuel-supply problem can leave you with a perfectly spinning drum full of wet clothes.
Thermostats and Temperature Controls Can Affect Drying
Dryers are designed to heat clothes without allowing temperatures to climb uncontrollably. To do that, they use temperature-regulating components that monitor heat and switch the heating system on and off as needed.
When one of these controls stops working correctly, drying performance can change dramatically. The dryer may produce too little heat, cycle the heater off too soon, or stop heating altogether.
Different dryer designs use different combinations of thermostats, temperature sensors, thermal cutoffs, and control electronics. Their names and locations vary, but their general job is the same: keep operating temperatures within a safe and useful range.
A failed temperature control can sometimes make clothes warm but never truly dry. The heater may turn on briefly and then stay off for too long. Because the drum continues spinning, the appliance seems normal unless you specifically notice the lack of sustained heat.
There is an important catch, though. Temperature-control parts often react to other problems rather than causing them. Restricted airflow can make a dryer run hotter than intended. A safety device may open or shut the heater down because it is protecting the appliance from overheating.
That means replacing a failed thermal safety component without correcting a clogged vent may result in the same problem happening again.
Before testing internal temperature components, clean the lint screen and confirm the exhaust path is open. Make sure the blower airflow is not obviously restricted.
Electrical testing requires the dryer to be unplugged and may involve resistance or continuity measurements with a meter. If you are not familiar with safe electrical testing, this is a good point to stop DIY work and seek professional dryer repair.
Do not bypass thermostats, thermal fuses, or safety devices to “see if the dryer heats.” These parts exist to reduce the risk of dangerous overheating. Bypassing them can create a serious hazard.
If airflow is good, the power supply is correct, and the heater itself appears functional, temperature regulation becomes the next logical part of the drying system to evaluate.
A Dirty Moisture Sensor Can End the Cycle Too Soon
If your dryer heats well but an automatic cycle keeps ending while clothes are still damp, the problem may be related to moisture sensing rather than heat production.
Many dryers use metal sensor strips inside the drum to detect moisture in clothing. As wet fabric touches the sensor, the machine receives information that the load still needs drying. As the fabric becomes drier, the readings change and the dryer decides when to stop.
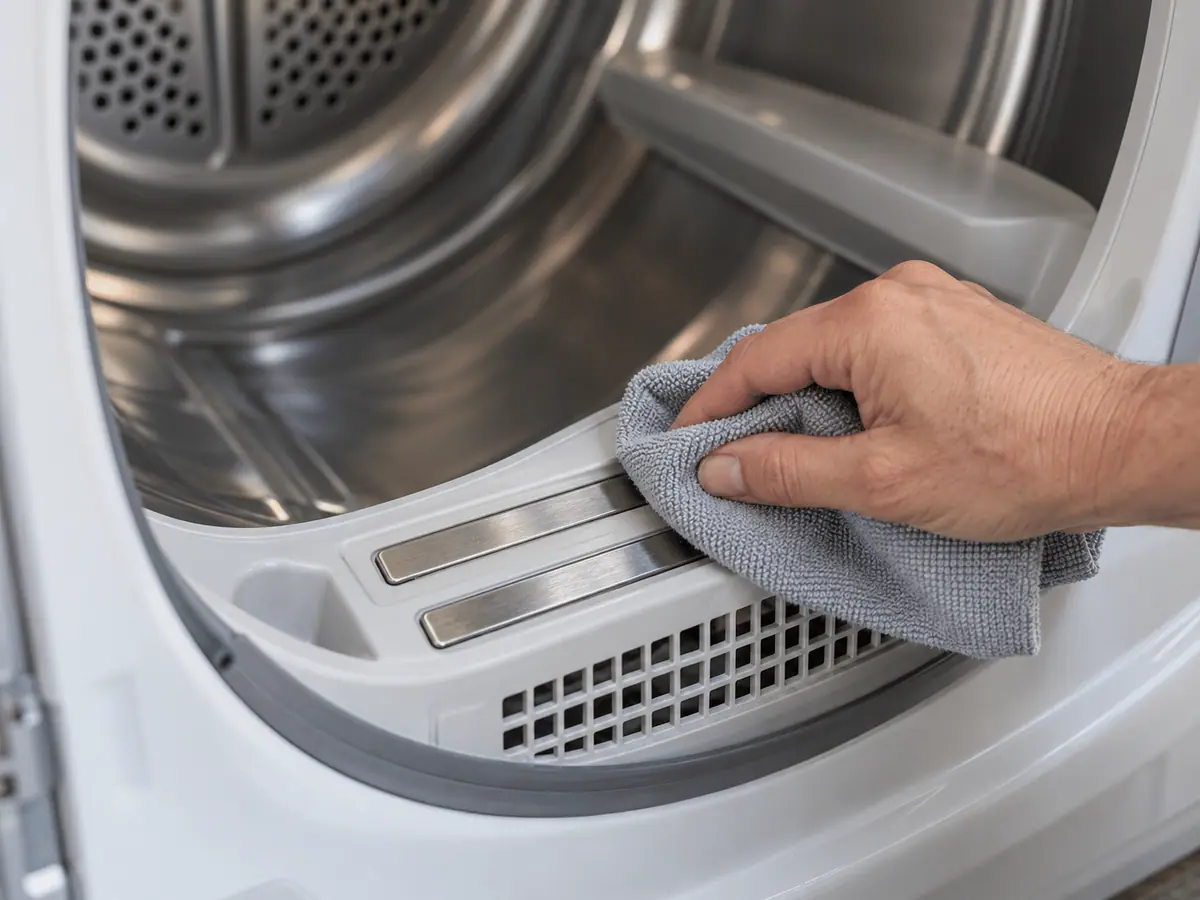
Over time, those metal strips can develop a thin coating from fabric-care products, detergent residue, or other material. The coating can interfere with the sensor’s ability to read moisture accurately.
You may notice a specific pattern: a timed drying cycle works reasonably well, but an automatic or sensor-based cycle ends too early. That difference is an excellent clue.
Find the moisture sensor strips if they are easily accessible inside the drum. They are often located near the front or lint-filter area, although the exact position varies. With the dryer off and cool, wipe them with a soft cloth and an appropriate mild cleaner that does not leave residue. Avoid abrasive materials that could damage the surface.
Do not confuse sensor trouble with poor load composition. A few heavy towels mixed with many lightweight items can confuse automatic drying because the dry items may contact the sensor more often than the wet ones.
Very small loads can cause similar issues. If only one or two garments are tumbling, they may not touch the sensor frequently enough for accurate readings.
Try comparing an automatic cycle with a timed cycle. If the clothes dry normally when you choose a fixed time but remain damp when the dryer decides when to stop, the sensing system deserves attention.
Cycle settings matter as well. Some modes are intentionally designed to leave clothing slightly damp for ironing or to protect delicate fabrics from excessive heat.
A dirty moisture sensor is easy to overlook because the dryer can produce plenty of heat and airflow. Yet the machine stops because it thinks the clothes are already dry. Cleaning those sensor surfaces can sometimes solve a frustrating problem in minutes.
The Drum May Not Be Turning the Clothes Correctly
Heat and airflow will not work efficiently if the laundry is not tumbling. Clothes need to move so that different surfaces are repeatedly exposed to warm air.
In a typical dryer, the drum rotates while internal baffles lift the clothes upward and allow them to fall back through the heated air. That constant movement prevents the load from sitting in one dense pile.
If the drum stops turning while the machine continues making noise, wet clothes may simply sit against one side. Some dryers will shut down when a drive belt breaks, while others may produce operating sounds that can make the situation less obvious.
Open the dryer door after stopping the machine and check whether the clothes have been tumbling normally. If you repeatedly find the load sitting in exactly the same position, drum rotation deserves investigation.
A worn drive belt can slip before it breaks completely. Support rollers, idler components, or motor-related parts can also make drum movement weak or irregular. You may hear squealing, thumping, scraping, or other unusual sounds.
With the dryer unplugged, try rotating the empty drum by hand. It should move with a reasonable, smooth resistance. A drum that is extremely difficult to turn may have a support or drive problem. One that spins unusually freely may indicate that the belt is no longer connected, depending on the dryer design.
Do not reach inside or around the drum while the dryer is running. Moving parts can cause serious injury.
Also inspect the internal baffles if accessible. If one is loose or damaged, clothing may not tumble as effectively and could create knocking noises.
Drum movement is usually easy to verify without major disassembly. Watch through the door if the design allows safe observation, or note whether the load position changes normally during the cycle.
When a dryer produces heat but the laundry remains bunched together, the issue may not be “drying” in the usual sense at all. The machine may simply be missing the mechanical movement needed to expose wet fabric to the hot airflow.
Room Conditions and Dryer Installation Can Affect Drying Time
A dryer does not operate in isolation. The temperature, ventilation, and layout of the room around it can influence how well it performs.
This matters most when the dryer is installed in a garage, basement, closet, utility room, or other location where conditions may be very different from the rest of the home.
Extremely cold air can affect drying performance because the machine has to heat colder incoming air. Drying may take noticeably longer during winter if the appliance sits in an unheated space.
A very small laundry closet can create another problem if the dryer does not receive enough replacement air. Remember that a vented dryer pushes a large amount of air outdoors. That air has to come from somewhere. If the closet is sealed tightly, airflow through the machine may decrease.
Check that required ventilation openings around the dryer have not been blocked by stored items, clothing, boxes, or recent remodeling.
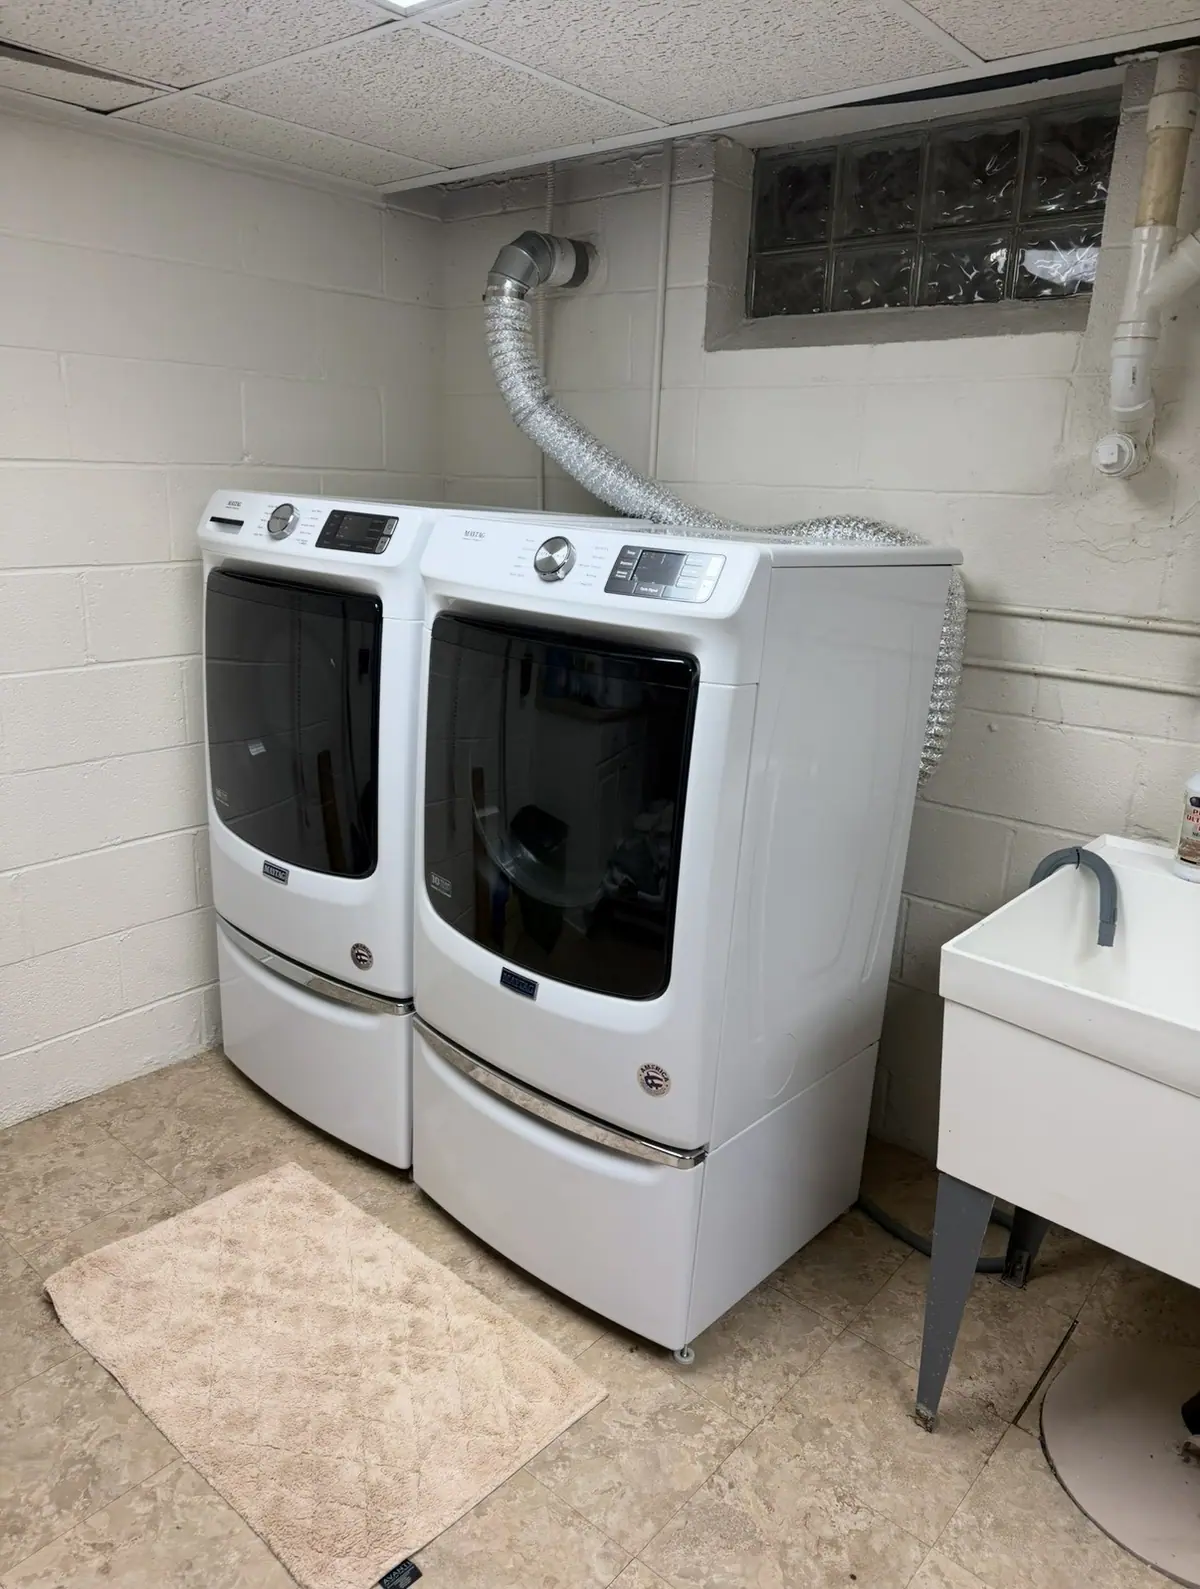
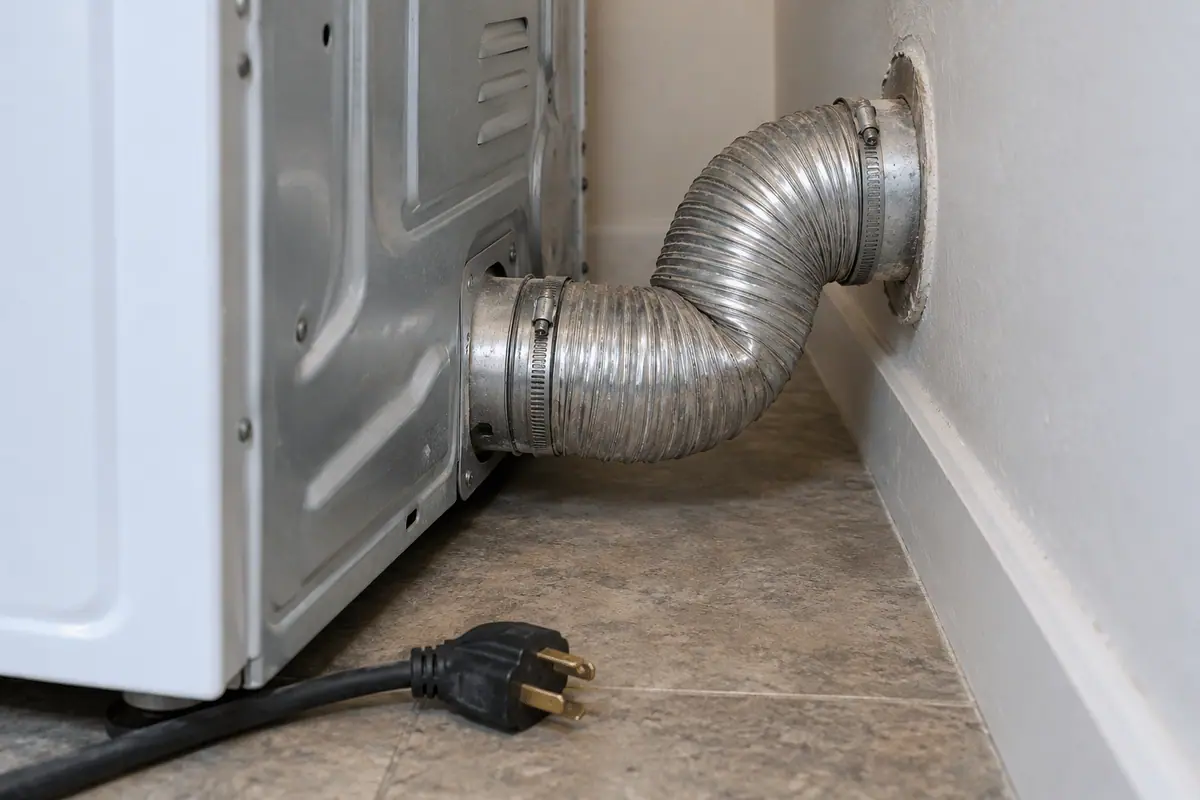
Installation behind the machine matters too. One of the most common problems I see after a dryer has been moved is a crushed exhaust duct. The dryer gets pushed too close to the wall, flattening the duct behind it. The machine itself is fine, but airflow drops immediately.
Pull the dryer forward carefully and inspect the exhaust connection. Disconnect power first, and if the dryer uses gas, be especially careful not to place stress on the gas connection.
Look for sharp bends, flattened sections, and excessive duct length. Air moves best through a short, smooth, properly sized path with as few unnecessary turns as possible.
Also check whether the dryer is level and stable. While leveling usually affects noise more than drying performance, poor installation can place stress on the exhaust connection or cause the duct to shift.
If drying problems began immediately after moving, remodeling, installing cabinets, or changing flooring, do not overlook installation.
A dryer that worked perfectly yesterday rarely forgets how to dry clothes overnight. Something around it may have changed.
Before replacing internal components, inspect the environment. Good airflow requires both a clear exhaust path and enough incoming air around the appliance.
How to Troubleshoot a Dryer That Runs but Does Not Dry
The best way to troubleshoot this problem is to work from the simplest and safest causes toward the more complicated ones. You do not need to dismantle the dryer on the first day. In fact, doing so too early often makes diagnosis harder.
Start with the laundry itself. Is the load unusually large? Are towels tangled inside a sheet? Were the clothes dripping wet when they came out of the washer? Correct those issues first and test again with a moderate, balanced load.
Next, check the lint filter. Clean it thoroughly and inspect the mesh for residue.

Then check airflow. Run the dryer and inspect the exterior exhaust outlet if it is safely accessible. The vent flap should open and airflow should feel strong. Weak exhaust is a major clue.
Unplug the dryer and inspect the duct behind it. Look for crushing, kinks, heavy lint, or loose connections. If the vent travels a long distance through the house, consider whether deeper cleaning is needed.
Now evaluate heat. Run a heated cycle for several minutes and check whether clothing becomes warm. If clothes stay cold, verify the selected cycle and power or fuel supply.
If the dryer is hot but clothes stay wet, return your attention to airflow. Heat without moisture removal is a classic vent problem.
If automatic cycles stop prematurely but timed cycles work, clean and inspect the moisture sensor.
Check drum rotation. Make sure clothing is actually tumbling rather than sitting in one place.
Think about installation and room conditions. Was the dryer recently moved? Is the vent hose crushed? Is the laundry closet poorly ventilated?
If all external checks pass, internal heating, temperature-control, blower, or drive components may need testing.
Always unplug the dryer before removing access panels. Electric dryers can contain high-voltage circuits, and gas dryers contain ignition and fuel-system components that require appropriate safety knowledge.
Avoid replacing several parts at once. One measured diagnosis is better than three guesses.
A good troubleshooting sequence follows the dryer’s actual process: load condition, airflow, heat, tumbling, sensing, and control. Work through those systems logically, and you can often identify why wet clothes are coming out of a machine that otherwise seems to run normally.
Conclusion
When your dryer runs but clothes stay wet, the problem usually comes down to one missing piece in the drying process. The machine either cannot move enough air, cannot generate enough heat, cannot tumble the clothes correctly, or is ending the cycle before the laundry is actually dry.
Start with airflow because it is both common and easy to check. Clean the lint screen, inspect the exhaust duct, and make sure the outdoor vent opens freely. A dryer that gets hot but leaves clothes damp often has trouble getting moisture-filled air out of the drum.
Then look at the load. A tightly packed drum or one giant bundle of sheets can prevent warm air from reaching wet fabric. Split large loads and make sure clothing has room to tumble.
Do not forget about the washer. If the washer leaves clothing much wetter than normal, even a perfectly healthy dryer will need considerably more time.
If the clothes remain cold, investigate the heating side. Confirm the cycle setting, electrical or gas supply, and eventually the heating and temperature-control components if basic checks do not reveal the cause.
Automatic cycles introduce another possibility. A dirty moisture sensor can convince the dryer that the load is dry long before it actually is.
Throughout the process, use the symptoms as evidence. Cold and wet, hot and wet, unevenly dry, or prematurely stopped all point in slightly different directions.
Most importantly, treat restricted airflow seriously. A clogged exhaust system does more than increase your utility bill. It can cause excessive heat buildup and create unnecessary stress inside the dryer.
There is a lot you can check safely with your own hands: load size, washer spin performance, lint screen condition, vent airflow, duct routing, exterior vent operation, cycle selection, and moisture-sensor cleanliness.
Once troubleshooting reaches high-voltage electrical components, gas systems, or internal safety controls, the job becomes more technical.
A dryer should not need two or three complete cycles to dry an ordinary load. When drying time suddenly changes, something has changed with the machine, the vent, the load, or the installation. Find that change, and the pile of damp laundry usually stops being such a mystery.