Table of contents
- What a Long Preheat Time Is Really Telling You
- The Oven May Not Be Getting the Full Power It Needs
- A Weak or Failing Heating Element Can Slow Preheating
- A Gas Oven May Have an Ignition or Burner Problem
- A Faulty Temperature Sensor Can Confuse the Oven
- The Oven Door May Be Letting Too Much Heat Escape
- Opening the Door Too Often Can Add More Time Than You Think
- Incorrect Rack Position and Cookware Can Affect Heat Circulation
- Heavy Grease and Buildup Can Interfere With Normal Heating
- Oven Calibration May Be Off Even When the Display Looks Right
- Room Temperature and Installation Conditions Can Matter
- How to Troubleshoot an Oven That Heats Too Slowly Yourself
- When Slow Preheating Points to a Bigger Repair
- Conclusion
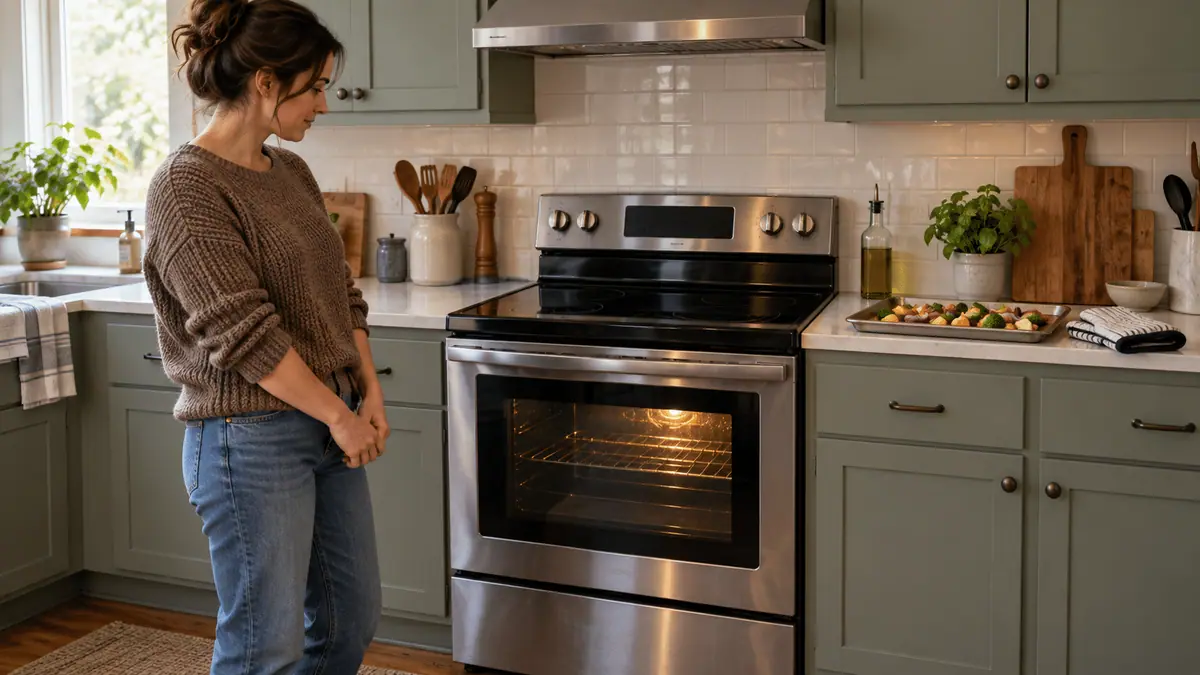
You set the oven to 400°F, start getting dinner ready, and expect the preheat signal within a reasonable amount of time. Instead, you are still standing around twenty minutes later wondering whether the oven is actually doing anything. Maybe it eventually reaches the temperature you selected, or maybe the display says it is ready while your food still takes forever to cook. Either way, an oven or range that takes too long to reach the right temperature is telling you that something in the heating process is not working as efficiently as it should.
A slow oven does not always mean an expensive failure. Sometimes the cause is surprisingly simple. The door may not be sealing properly. A heating element may be weakening. A temperature sensor may be giving inaccurate information. A gas oven may be taking too long to ignite. The appliance might even be receiving only part of the electrical power it normally needs. On top of that, certain cooking habits can stretch preheat time more than most people realize.
The important thing is to separate a genuinely slow-heating oven from normal preheating behavior. Large ovens naturally take longer than compact ones. Cold weather can affect appliances installed in unheated spaces. High-temperature settings take longer to reach than moderate ones. And if you keep opening the door to “see if it is hot yet,” you are letting a surprising amount of heat escape every time.
The best way to troubleshoot this problem is to work through the heating system in a logical order. Start with the easy things you can observe from the outside. Check the door. Watch the heating elements. Listen to a gas burner. Use an oven thermometer if you have one. Pay attention to whether the oven eventually reaches temperature or simply stops heating before it gets there.
There is a lot you can safely inspect with your own hands before replacing anything. The goal is not to tear the appliance apart. It is to understand what the symptoms are telling you and narrow the problem down before you spend money on unnecessary parts or oven repair.
What a Long Preheat Time Is Really Telling You
Before you start testing parts, it helps to understand what preheating actually involves. Your oven has to take the air, metal walls, racks, and internal cooking space from room temperature to the temperature you selected. That requires a substantial amount of energy. During preheating, the heating system usually operates for long periods because the appliance is trying to raise the internal temperature as quickly as possible.
If everything is working correctly, the oven heats at a fairly predictable rate. You may hear relays clicking, see heating elements glow, or hear a gas burner cycle depending on the design. Once the temperature sensor detects that the oven is close to the set point, the control system reduces or cycles the heat to maintain that temperature.
When preheating suddenly becomes much slower than it used to be, one of three things is usually happening. The oven is not producing enough heat, too much of that heat is escaping, or the control system is receiving inaccurate information about the actual temperature.
Those categories are useful because they keep troubleshooting simple. If the oven produces weak heat, you look at the power supply, heating elements, gas burner, or ignition system. If heat escapes, you inspect the door gasket and door alignment. If the oven seems hot but the display does not agree, you start thinking about the temperature sensor or calibration.
Timing matters too. A problem that appears overnight points toward a sudden component or power issue. A preheat time that gradually gets longer over several months may indicate a weakening heating element, deteriorating door seal, or increasing ignition difficulty.
Also pay attention to cooking performance after preheating. Does the oven eventually reach the set temperature and then cook normally? Or does everything take longer from start to finish? Those are different symptoms.
If preheating is slow but cooking becomes normal once the oven gets hot, the problem may be most obvious during initial heat-up. If food remains undercooked throughout the cycle, the oven may be struggling to maintain heat as well.
The big idea is simple: preheating is a stress test for the oven’s entire heating system. When it takes much longer than usual, the appliance is giving you an early clue that something deserves attention.
The Oven May Not Be Getting the Full Power It Needs
One of the most overlooked reasons an electric oven heats slowly is an incomplete power supply. The appliance can look completely normal from the outside. The clock works, the display lights up, the oven light comes on, and the controls respond. Yet the heating system may not be receiving the full electrical power it needs.
Many electric ranges and ovens use a higher-voltage circuit for their heating elements. If part of that supply is interrupted, the control panel may still have enough power to operate while one or more heating components do not work normally.
This is why an oven can appear alive while taking forever to preheat.
Start at the electrical panel. Look for a tripped breaker associated with the oven or range. Some cooking appliances use a double-pole breaker. One side of the circuit can sometimes be affected while the appliance still shows signs of life.
If you know how to safely reset a breaker, switch it fully off and then back on. Do not repeatedly reset a breaker that trips again. A breaker that will not stay set is not something to “work around.” It indicates an electrical problem that needs proper diagnosis.
You should also pay attention to the power cord and outlet if they are accessible. Any burning smell, melted plastic, discoloration, buzzing, or excessive heat around the connection is a serious warning sign. Stop using the appliance and have the electrical connection evaluated.
A recently installed range deserves special attention. If the slow-heating problem started immediately after installation, incorrect wiring or an incomplete power connection may be involved.
The same principle applies after electrical work in the home. If the oven suddenly begins heating slowly after breaker replacement, outlet work, or a power outage, the supply should be checked before you assume the oven itself failed.
Do not remove terminal covers or probe live electrical connections unless you have the proper knowledge and equipment. Electric cooking appliances can use dangerous voltage.
From a DIY perspective, your job is to recognize the pattern. If the oven display works but one heating element seems dead, or preheat suddenly takes twice as long without any other obvious change, the power supply belongs near the top of the troubleshooting list.
A Weak or Failing Heating Element Can Slow Preheating
Electric ovens usually rely on one or more heating elements to raise and maintain temperature. Depending on the design, you may have a lower bake element, an upper broil element, and sometimes an additional convection heating element. During preheating, the oven may use more than one of these components to reach the selected temperature efficiently.
That means one failed element does not always prevent the oven from heating completely. The remaining element may still bring the oven up to temperature, but it can take much longer.
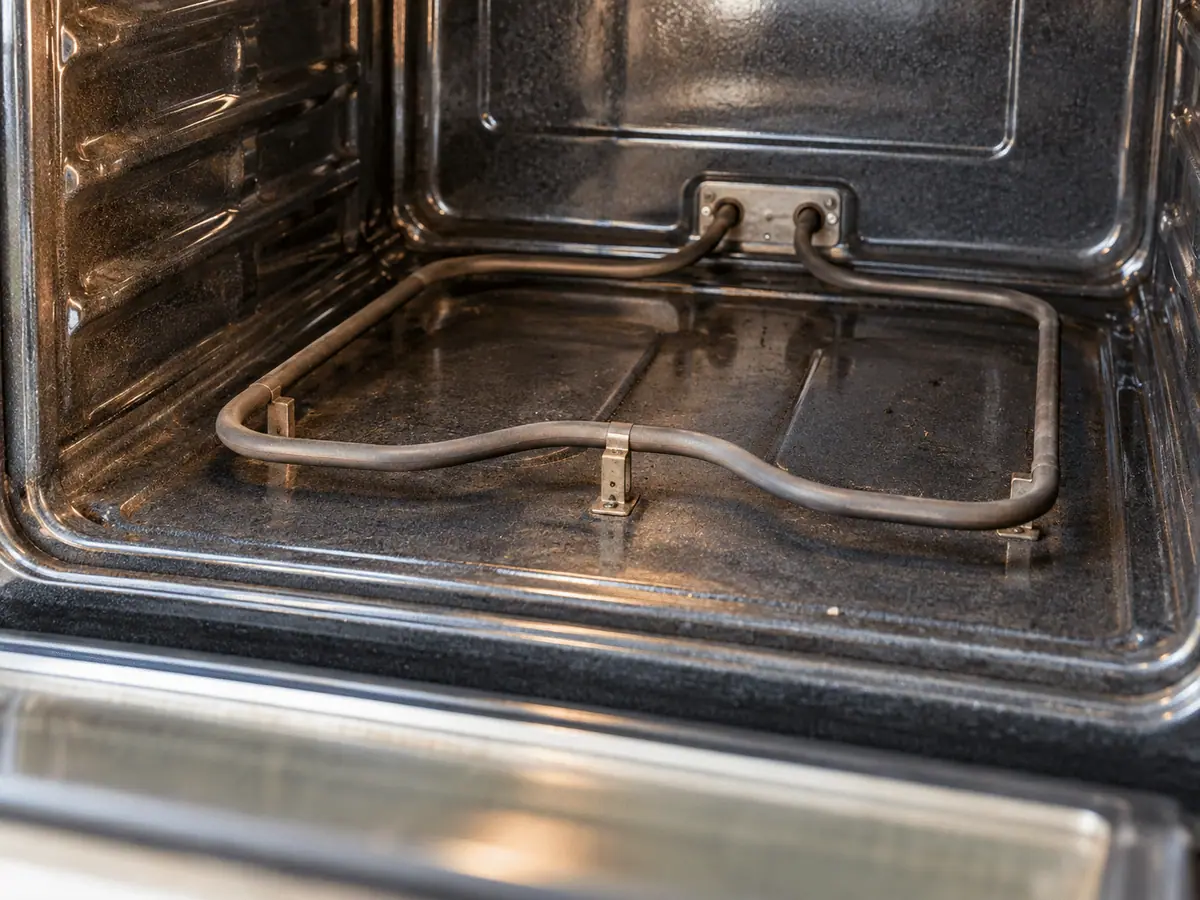
This is one of the classic situations where people say, “The oven still works, but it is incredibly slow.”
Start with a visual inspection. With the oven empty and operating on an appropriate heating cycle, observe the visible elements from a safe distance. Some electric elements glow bright orange or red when heating strongly. If one section remains dark while the rest heats, or an entire element never warms, that is useful information.
Be aware that not every element is visible, and some designs cycle elements in ways that make a quick glance misleading. Still, obvious physical damage is worth checking for.
When the oven is completely cool and disconnected from power, inspect accessible elements for blisters, cracks, burn marks, breaks, or areas where the metal sheath has separated. A damaged element may fail completely or operate intermittently.
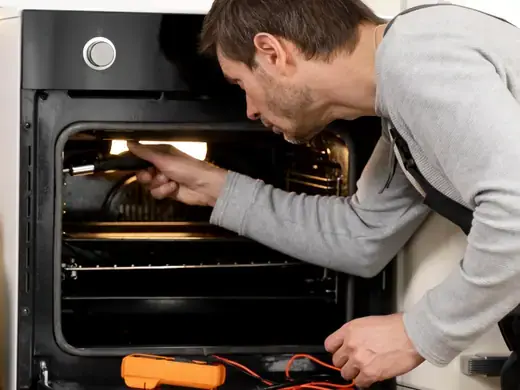
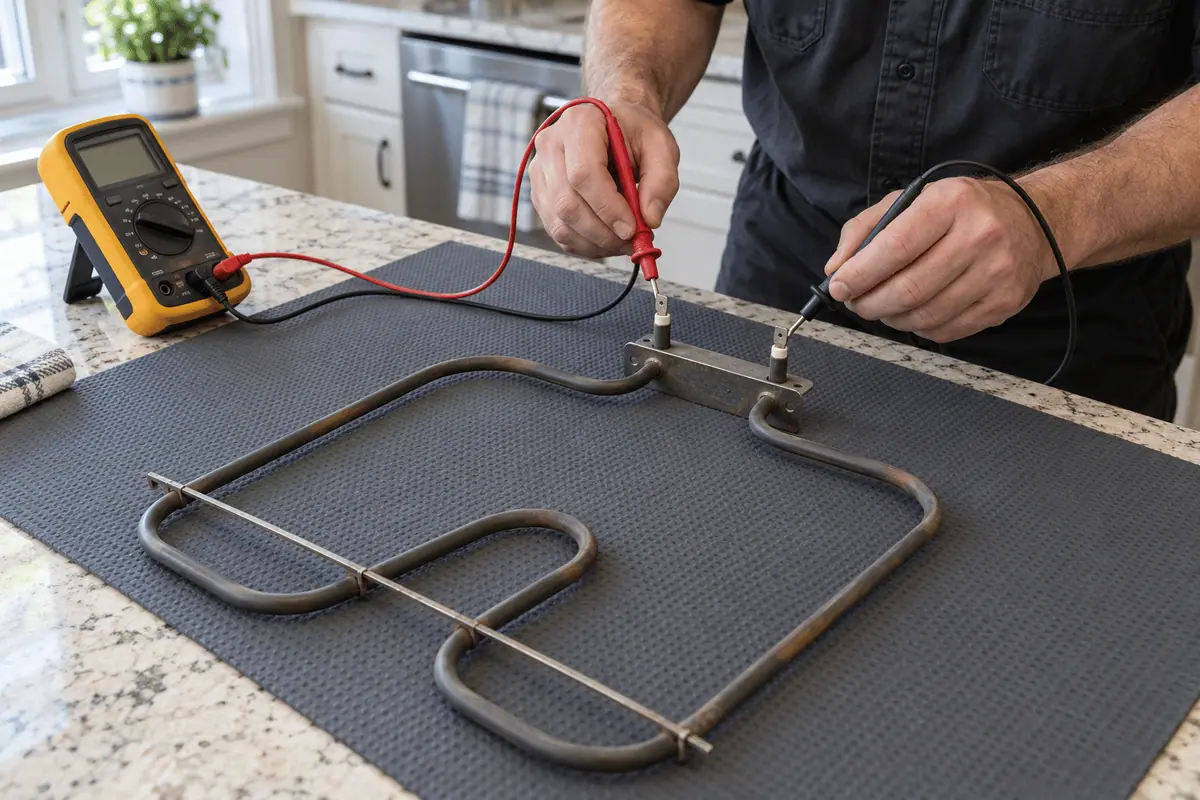
A heating element can also weaken electrically without looking dramatically damaged. That is where resistance testing with a multimeter becomes useful. The appliance must be disconnected from power before electrical continuity or resistance testing.
If you are comfortable with basic electrical testing, you can test an element after safely disconnecting it according to the appliance design. If you are not familiar with this process, visual inspection and symptom tracking are still valuable.
One clue is uneven oven heating. A failed lower element can produce an oven that heats slowly and leaves food undercooked on the bottom. A failed upper element may affect browning and preheat performance differently.
Do not assume that because the oven eventually gets hot, all elements are functioning. One working element may be doing the job of two.
A slow preheat combined with uneven cooking is one of the strongest practical clues that a heating element deserves closer attention.
A Gas Oven May Have an Ignition or Burner Problem
Gas ovens approach heating differently, but the symptom can look almost identical. You turn the oven on, wait much longer than usual, and eventually get some heat. In that situation, the burner or ignition system may not be operating correctly.
Many gas ovens use an electric igniter to start the gas burner. The igniter has to reach the proper operating condition before the gas valve opens fully. As the igniter ages, it may still glow but take longer to trigger gas flow.
That creates a frustrating situation because the igniter looks like it is working. You can see it glowing, yet the burner may take an unusually long time to light.
Listen carefully when the oven starts. In normal operation, the ignition process should be relatively consistent. If the igniter glows for a long period before you hear the burner ignite, or if the burner repeatedly delays, shuts off, and relights, the ignition system may be weakening.
A weak igniter can also affect temperature maintenance. The burner may take too long to relight each time the oven calls for heat. That can create large temperature swings and long cooking times even after preheating is complete.
The burner itself can also be part of the problem. Debris, grease, or improper combustion can interfere with a clean flame pattern. A healthy gas burner should produce a stable flame appropriate to the design.
Do not try to modify burner openings or gas pressure yourself. Those adjustments require proper knowledge and equipment.
Most importantly, treat gas odors seriously. If you smell unburned gas strongly or consistently, stop using the appliance and follow appropriate gas-safety procedures. Do not continue troubleshooting by repeatedly trying to ignite the oven.
A weak ignition system can be deceptive because the oven may eventually heat every time. The issue is that “eventually” becomes longer and longer.
If your gas oven used to light quickly and now takes much more time before the burner comes on, the ignition process is giving you a valuable diagnostic clue. Slow preheating may not be about the amount of gas available at all. It may be about how reliably and quickly the oven can start each heating cycle.
A Faulty Temperature Sensor Can Confuse the Oven
Your oven cannot control temperature if it does not know how hot the cooking chamber actually is. That job belongs to the temperature-sensing system.
In many ovens, a temperature sensor sits inside the cooking compartment and continuously reports temperature information to the control system. If the sensor provides inaccurate readings, the oven may reduce heat too early, wait too long between heating cycles, or believe it has reached the selected temperature when it has not.
This is where slow heating becomes confusing. The heating elements or burner may be perfectly capable of producing enough heat, but the control system is acting on bad information.
Suppose the actual oven temperature is 300°F, but the sensor tells the control that the oven is already near 350°F. The control may reduce heat output even though the oven still has a long way to go.
You might notice that the preheat indicator comes on earlier than expected, yet food takes unusually long to cook. An independent oven thermometer can help reveal this difference.
Temperature sensors can also become inaccurate only at certain temperatures. The oven may behave reasonably at 300°F but struggle at 425°F. That is why one test at one temperature does not always tell the whole story.
With the appliance disconnected from power and completely cool, you may be able to inspect the sensor visually. Look for obvious damage, loose mounting, or a sensor that has been bent so it touches the oven wall. Direct contact with the metal wall can influence readings in some designs.
Electrical testing of the sensor usually involves checking resistance and comparing the result with the expected value at a known temperature. That requires a multimeter and the correct technical information for the appliance design.
Do not attempt to “fix” temperature accuracy by bending the sensor or moving it randomly.
A faulty sensor often produces more than just slow preheating. You may see large temperature swings, uneven cooking, premature preheat signals, or food that consistently cooks too slowly or too quickly.
If the oven has good power, functional heating components, and a tight door but the temperature still seems wrong, the sensor becomes a logical next suspect.
The Oven Door May Be Letting Too Much Heat Escape
An oven can generate plenty of heat and still take forever to preheat if that heat keeps escaping through the door.
The door is designed to create a controlled cooking chamber. Its gasket forms a seal around the opening, limiting the amount of hot air that leaks out. Over time, that gasket can become compressed, torn, hardened, dirty, or displaced.
Even a relatively small gap can make a noticeable difference. The heating system runs longer because it has to replace heat that continuously escapes into the kitchen.
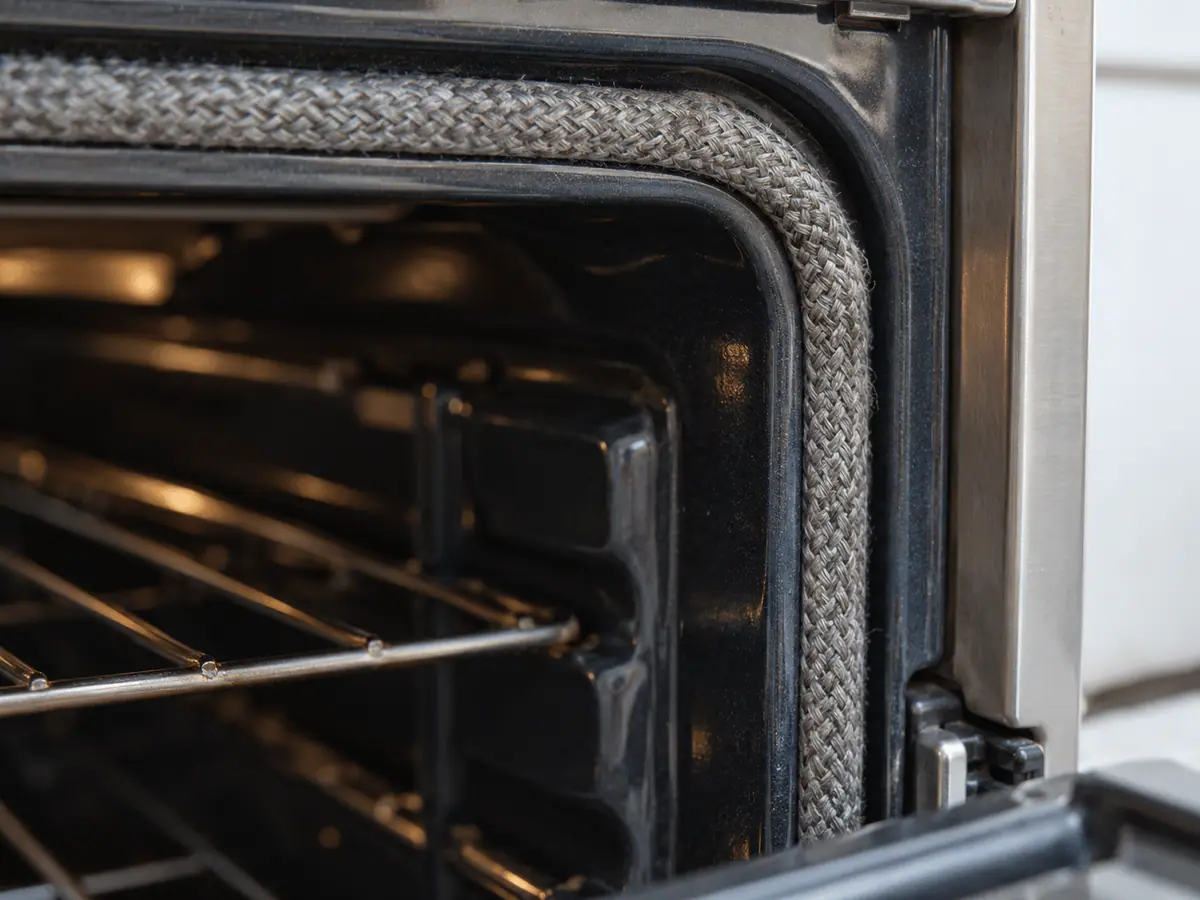
Start with a visual inspection while the oven is completely cool. Look around the perimeter of the door opening and examine the gasket. It should sit evenly and remain flexible. Torn sections, missing clips, burned areas, or obvious gaps deserve attention.
Food residue can also interfere with the seal. Grease and baked-on material may prevent the gasket from sitting correctly against the mating surface. Clean accessible areas carefully without stretching or damaging the gasket.
Next, check the door itself. Does it close evenly? Does one corner stick out farther than the other? Does the door feel loose on its hinges? A damaged hinge can prevent the gasket from making full contact even when the gasket itself is fine.
You may notice unusual heat around one side of the door while the oven is operating. Some warmth is normal, but a strong concentrated stream of hot air can point toward a sealing issue.
Avoid slamming the oven door. Repeated impact can wear hinges and alignment over time.
Also check whether anything is physically stopping the door from closing. A rack installed incorrectly, oversized pan, foil, or warped accessory can interfere with the door without being immediately obvious.
A leaking door often produces symptoms beyond slow preheating. The kitchen may become unusually warm, nearby cabinet surfaces may feel hotter, and cooking times may increase.
Think of your oven like a well-insulated room. The heater can be powerful, but if someone leaves the window cracked open, reaching the target temperature takes longer.
When heat production seems normal but preheating is still slow, the door seal is one of the easiest DIY areas to inspect before you move on to electronics.
Opening the Door Too Often Can Add More Time Than You Think
Sometimes the oven is working perfectly, and the real problem is how often the door gets opened.
It is completely natural to want to check your food. You smell cookies, hear something sizzling, and your first instinct is to open the oven and look. The problem is that every door opening dumps a large amount of hot air into the kitchen.
The oven temperature can drop quickly, especially during preheating. Once you close the door again, the heating system has to replace that lost energy before the oven returns to the selected temperature.
This is why constantly checking whether the oven is “almost ready” can actually make it take longer to become ready.
Modern oven windows exist for a reason. Use the interior light whenever possible instead of opening the door.
Door opening matters even more when baking foods that depend on stable temperature. Bread, cakes, pastries, and certain casseroles can all be affected by sudden temperature drops.
During preheating, leave the oven empty unless the recipe specifically requires a pan or baking surface to preheat as well. Every large cold item you place inside becomes another object the oven has to heat.
For example, a heavy cast-iron pan, pizza stone, or thick baking steel can significantly increase the time required for the entire oven system to stabilize. That does not mean anything is wrong. You have simply added more thermal mass.
The same thing happens if you load a cold dish into the oven before preheating is complete. The oven now has to heat both the cooking chamber and the food at the same time.
If you are testing preheat performance, make the test consistent. Start with a cool oven, set one temperature, keep the door closed, and measure how long it takes.
Do not compare one day when the oven was empty to another day when it contained two heavy pans and the door was opened four times.
Good diagnosis requires repeatable conditions.
Before assuming your appliance is getting weak, pay attention to how much heat you may be letting escape during normal cooking habits. Sometimes the “slow oven” is doing exactly what it should under unnecessarily difficult conditions.
Incorrect Rack Position and Cookware Can Affect Heat Circulation
Rack position does not usually cause a dramatic mechanical preheat failure, but it can affect how quickly and evenly heat moves through the cooking chamber.
Ovens rely on convection, radiation, and air circulation. When racks, pans, baking stones, foil, or oversized cookware block that movement, you can create hot and cool zones inside the oven.
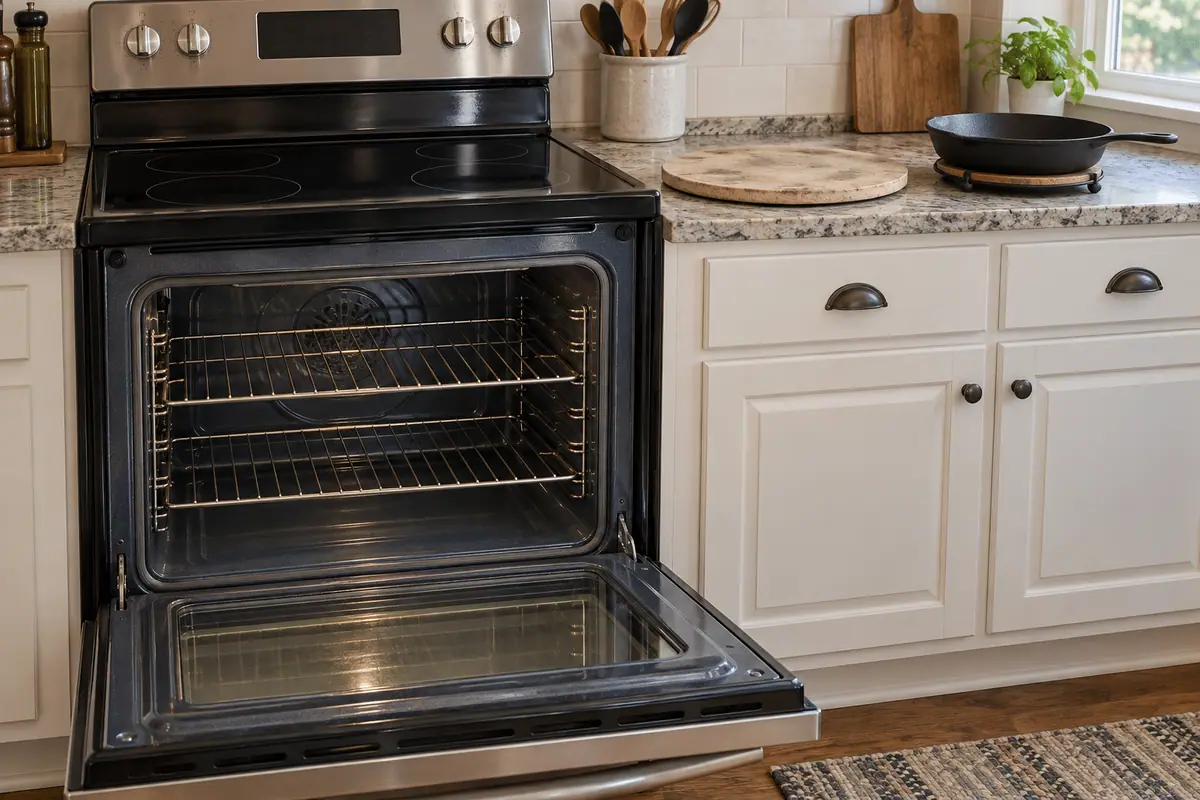
Large baking sheets are a common example. If a pan nearly covers an entire rack, it can restrict the natural movement of hot air from the lower heating area toward the upper part of the oven.
If you place several large pans inside at once, the effect becomes more noticeable. The oven may reach the measured temperature at the sensor while the air around the food remains uneven.
This can make it feel as though the oven “takes forever to get hot,” when the actual problem is distribution rather than raw heating power.
Do not line the entire bottom of the oven or cover racks completely with foil unless the appliance design specifically allows it. Large foil sheets can interfere with airflow and heat transfer. They may also reflect heat toward areas that were not designed for that exposure.
Heavy cookware adds thermal mass too. A thick roasting pan or large baking stone absorbs a lot of energy before it reaches cooking temperature. The oven may technically signal that preheating is complete while those objects are still warming.
Rack position matters depending on what you are cooking. A dish placed too close to one heating element may brown on one side while remaining undercooked elsewhere.
If you are troubleshooting slow heating, simplify the oven interior. Remove unnecessary pans, foil, stones, and accessories. Leave only the standard racks in normal positions and test preheat time again.
Then compare results.
If the oven suddenly heats much more predictably when empty, the heating system may be fine.
Also leave some space around cookware during normal cooking. Hot air needs room to move.
An oven is not just a heated box. It is a controlled airflow and radiant-heat environment. When you block that environment with too much metal, you change how the heat reaches your food.
So before replacing parts, make sure the appliance is not being asked to heat through an unnecessary obstacle course of oversized cookware, blocked racks, and excessive thermal mass.
Heavy Grease and Buildup Can Interfere With Normal Heating
A dirty oven does not always heat slowly, but heavy buildup can contribute to poor performance in several ways.
Grease, food residue, carbonized spills, and burned material can accumulate around heating areas, vents, sensors, and burner openings. That buildup can interfere with airflow, temperature sensing, or combustion.
In an electric oven, thick residue on or near a temperature sensor may affect how accurately the sensor responds to changes in air temperature. You should never scrape or aggressively clean a sensor while the appliance is hot, but keeping the surrounding area reasonably clean helps.
In gas ovens, debris around burner openings can disrupt normal flame distribution. A burner that does not produce a clean, even flame may heat the cavity less efficiently.
Vent openings are another area people forget. Ovens are not completely sealed. They have designed vent paths that allow pressure and moisture to escape. Blocking those openings with grease, foil, or kitchen items can change how the appliance manages heat.
Clean the oven according to its normal maintenance requirements, but avoid the temptation to use extremely aggressive chemicals on sensitive surfaces or heating components.
If you are manually cleaning, make sure the oven is completely cool and disconnected from power when you are working close to electrical parts.
Do not spray cleaners directly into burner openings, fans, electrical connectors, or vents.
Self-cleaning cycles, where present, operate at extremely high temperatures. They can be useful for certain types of buildup, but they also place heavy thermal stress on the appliance. If the oven is already showing signs of heating or control problems, it may be smarter to diagnose those issues before running an extreme-temperature cleaning cycle.
Pay attention to changes after a major spill. If slow heating began shortly after food boiled over or grease spilled near a burner or element, the timing may be relevant.
A little cooking residue is normal. An oven does not need to look brand new to work properly. The concern is heavy buildup in places where heat, air, or sensing depend on clear surfaces.
Cleaning is not a magic repair, but it is a sensible DIY step before assuming that every slow-heating problem requires a new component.
Oven Calibration May Be Off Even When the Display Looks Right
One of the trickiest oven problems occurs when the display says one thing and the actual temperature says another.
You set the oven to 375°F. The preheat signal sounds. Everything appears normal. But food takes much longer than the recipe suggests. When you check with a separate thermometer, the oven may actually be sitting at 330°F or 340°F.
That is a calibration issue, or at least a temperature-accuracy issue that needs investigation.
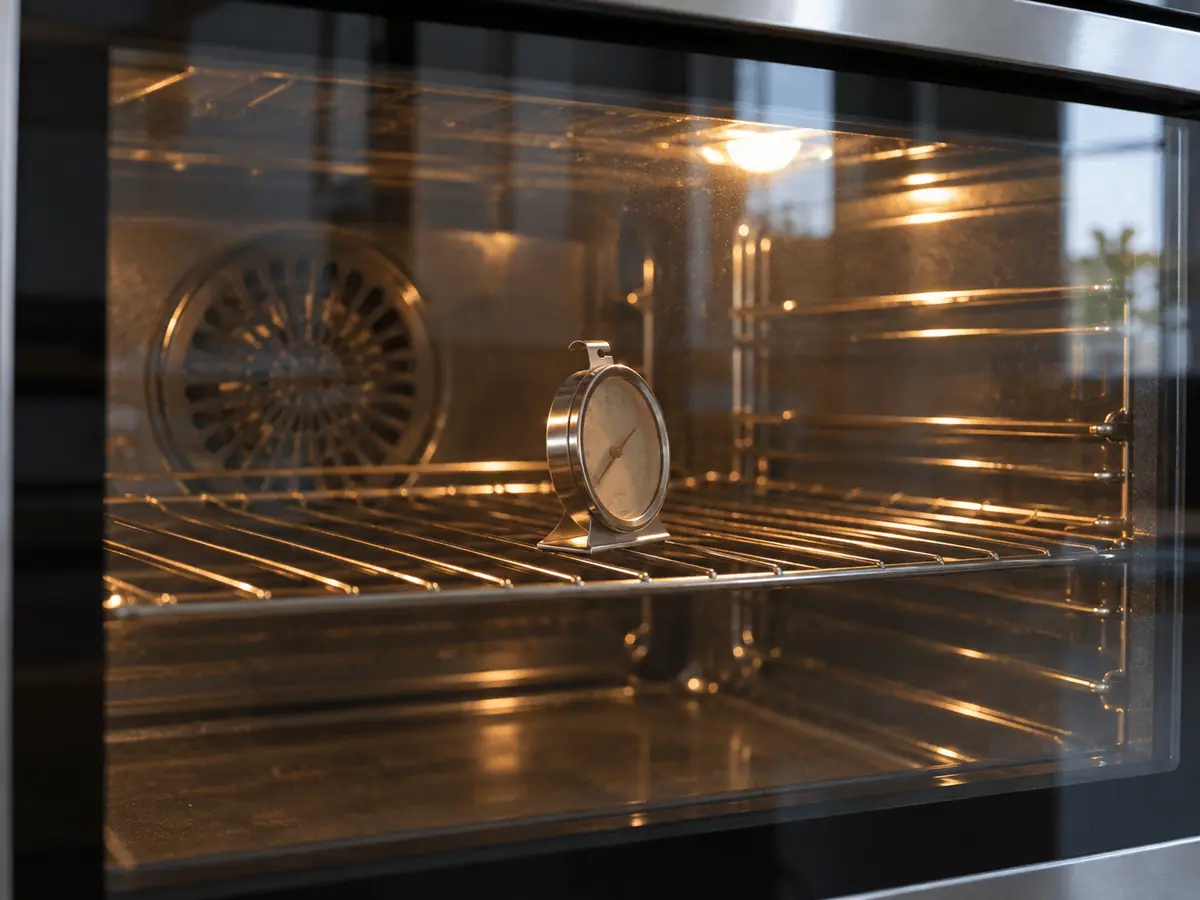
Ovens naturally cycle above and below the set temperature. They do not usually hold one exact number every second. The heating system turns on and off to maintain an average temperature near your setting.
That means you should not judge calibration based on one quick thermometer reading. Give the oven time to stabilize and observe several heating cycles.
Place a reliable oven thermometer near the center of the cooking area, away from direct contact with walls, racks, and heating elements. Set the oven to a moderate temperature and allow it to preheat fully.
Then watch the temperature over time.
If the average temperature remains consistently lower than the set point, calibration may be needed. Some ovens allow a user adjustment through the control settings. Others require mechanical or electronic service.
Before changing calibration, make sure you are not masking another problem. A failing heating element, bad sensor, power issue, or door leak can also create low temperatures. Calibration is appropriate only when the oven consistently operates off target while the heating system itself is otherwise healthy.
Do not use calibration to compensate for a 75-degree error. Large temperature differences usually point toward a real fault rather than a normal adjustment.
The difference between preheat indication and true stabilization also matters. Some ovens announce preheat when the air near the sensor reaches the target, even though the racks, walls, and cookware have not fully stabilized. For sensitive baking, giving the oven a few extra minutes after the signal can improve consistency.
Still, if your oven always runs 20 or 30 degrees cooler than selected, that is useful evidence.
A thermometer turns the vague complaint “this oven seems slow” into actual information you can work with.
Room Temperature and Installation Conditions Can Matter
Most ovens are installed in climate-controlled kitchens, so room temperature does not usually create dramatic problems. Still, installation conditions can influence heating performance more than people expect.
An appliance installed in an unheated garage, seasonal kitchen, basement, or outdoor-adjacent space may start from a much lower temperature during winter. The colder the metal cavity is at the beginning, the more energy the oven must use before it reaches the selected temperature.
A difference of a few minutes may be completely normal under those conditions.
Ventilation around the range also matters. The appliance is designed to manage heat in a specific way. Blocking vents or surrounding the oven with improperly installed cabinetry can affect normal operation.
If slow heating began after a kitchen remodel, cabinet installation, new countertop work, or flooring changes, pay attention to what changed around the appliance.
Built-in ovens need appropriate clearances and ventilation according to their installation requirements. A poorly installed unit may trap heat in areas where it should not accumulate or restrict designed airflow.
For gas ranges, room conditions also influence combustion. Proper airflow is necessary for safe burner operation. Do not block ventilation openings in an attempt to “keep more heat inside.”
Electrical installation matters as well. A range that was recently moved may have a loose connection, damaged cord, or improper circuit connection.
Make sure the appliance is sitting correctly and has not shifted against a wall in a way that pinches wiring, gas tubing, or ventilation areas.
If the range also has cooktop burners, compare their performance. An electric range with unusually weak surface elements and a slow oven may have a supply issue affecting the entire appliance. A gas range with weak flames at multiple burners may point toward a supply condition rather than one oven component.
Environmental clues are especially valuable when the oven itself tests normally.
Ask what changed outside the appliance. Was it moved? Was the kitchen remodeled? Did extremely cold weather begin? Was electrical work performed?
An oven rarely develops a new personality for no reason. Sometimes the problem is inside. Sometimes the installation environment around the appliance changed first.
How to Troubleshoot an Oven That Heats Too Slowly Yourself
The best DIY troubleshooting process moves from simple observations toward more technical checks. You want to eliminate easy causes before you start testing internal components.
Begin by testing the oven under consistent conditions. Make sure it is empty except for normal racks. Start when the oven is cool. Set a common temperature such as 350°F and keep the door closed.
Time how long preheating takes.
If you have an oven thermometer, place it near the center and compare the actual temperature with the display after the oven has had time to stabilize.
Next, inspect the door. Look at the gasket, hinge alignment, and closing action. Make sure nothing prevents the door from sealing.
For an electric oven, observe the heating elements during operation if they are visible. Look for a lower element that never heats or obvious damage once the appliance is cool and unplugged.
Check the electrical panel for a partially tripped breaker. If a reset is appropriate and safe, perform it once. Do not repeatedly reset a breaker that trips again.
For a gas oven, listen to the ignition process. Note whether the igniter seems to operate for an unusually long time before the burner lights. Watch for consistent burner operation from a safe position.
Do not continue testing if you smell gas strongly.
Clean obvious grease and debris from accessible areas when the oven is cool. Keep vents and sensing areas clear.
Then think about cooking habits. Are you opening the door repeatedly? Is a giant baking stone always inside? Are you comparing a loaded oven with an empty preheat time?
If the oven is consistently low by a modest amount, investigate calibration. If it is dramatically low or never reaches the target, calibration alone is unlikely to solve the problem.
If you are comfortable using a multimeter and understand electrical safety, you may continue with resistance testing of heating elements or temperature sensors after disconnecting the appliance from power.
Do not perform live-voltage testing unless you are trained to work safely around high voltage.
Most importantly, change one thing at a time. If you clean the oven, adjust calibration, replace an element, and reset the breaker all in one afternoon, you may never know what actually fixed the problem.
Good troubleshooting is about following evidence rather than guessing at parts.
When Slow Preheating Points to a Bigger Repair
Not every slow oven needs professional service, but there are clear signs that the problem has moved beyond simple DIY maintenance.
If the oven repeatedly trips the breaker, stop using it until the electrical problem is identified. A breaker is a safety device, not an inconvenience to keep resetting.
A burning electrical smell, melted insulation, scorched wiring, or visible arcing also requires immediate attention.
Gas odors are equally serious. If unburned gas is present, do not continue operating the oven to “see if it lights eventually.” Follow proper gas-safety procedures and have the system evaluated.
Major temperature errors deserve investigation too. An oven that is 10 or 15 degrees off may need calibration. An oven that is 75 or 100 degrees below the set point probably has a failed component or control problem.
If more than one heating element fails, or if an element repeatedly burns out, there may be a deeper electrical issue.
Intermittent heating can also point toward control-board relays, wiring connections, temperature-sensing faults, or safety devices. Those problems are harder to diagnose without proper electrical testing.
A gas igniter that glows but consistently takes a long time to open the gas valve may need replacement. Working around gas and ignition components should be approached carefully.
You should also stop using the oven if the door cannot close securely. A severely damaged hinge or broken door assembly can allow dangerous amounts of heat to escape.
Control problems deserve attention as well. If the oven heats when it should be off, overshoots temperature dramatically, or behaves unpredictably, disconnect power and investigate before using it again.
DIY repair makes sense when the task is clear, accessible, and within your skill level. Cleaning a gasket, checking a breaker, observing an element, using an oven thermometer, and inspecting visible damage are straightforward.
The line changes when you reach live electrical testing, gas systems, complex control circuits, or major disassembly.
The goal is not to prove that every repair can be done at home. The goal is to identify as much as you can safely, so if you need professional range repair, you already understand the symptoms and likely system involved.
Conclusion
An oven or range that takes too long to reach the right temperature is usually struggling with one of a few basic things: it is not generating enough heat, it is losing heat too quickly, or it is getting bad information about the actual temperature.
Start with the easy checks. Make sure the door closes firmly and the gasket is intact. Keep the door shut during preheating. Remove unnecessary heavy cookware when testing. Check the breaker if you have an electric range, and pay attention to whether all heating elements appear to be working.
For a gas oven, listen to how quickly the burner ignites. A slow or inconsistent ignition process can add a surprising amount of time to preheating.
Use an independent oven thermometer when temperature accuracy is in question. It is one of the cheapest and most useful tools for separating “this oven feels slow” from a measurable temperature problem.
A heating element that has failed, a weak igniter, a bad temperature sensor, poor calibration, or a damaged door seal can all create similar symptoms from the outside. That is why observation matters.
Pay attention to what happens after the oven finally reaches temperature. If cooking becomes normal, the problem may be concentrated in the preheat stage. If food stays undercooked throughout the cycle, the oven may also be struggling to maintain temperature.
Do not ignore electrical or gas warning signs. Repeated breaker trips, burned wiring, gas odors, or uncontrolled heating are reasons to stop using the appliance until the cause is understood.
For many homeowners, the first round of diagnosis is completely manageable with basic tools and careful observation. You can inspect the door, watch the heating system, clean accessible areas, verify settings, check the breaker, and compare actual temperature with the display.
The biggest mistake is assuming that a slow oven simply needs “more time.” If preheating has changed significantly from the way the appliance used to behave, something has changed.
Find that change, and you are much closer to understanding why your oven or range takes too long to reach the right temperature.